Foldaway shopper tutorials
Claire November 16th, 2010
It’s been a while hasn’t it? Lots happening, and lots of good blogging intentions that have slipped. Saying that, I really want to get back to blogging, but struggle to find things to write about, so I have decided that I will mainly try and post tutorials on here, and since Christmas is fast approaching, I wanted to offer some tutorials for things that are easy and quick to make, and would make nice gifts. The first of these are 2 shopping bags.
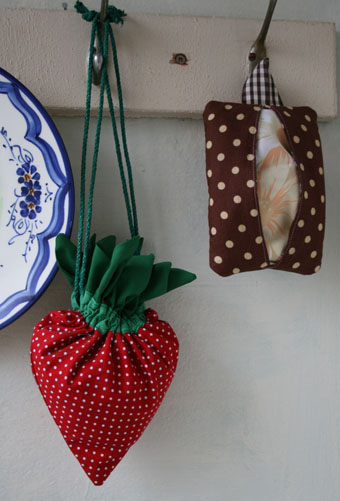
The first one we will tackle here is the shopper that folds into it’s own pouch – I will be back with instructions for the strawberry one later in the week.
I don’t know about you but I have no shortage of bags for life / canvas bags/ tote bags – you name it. I just end up getting or making more as I never remember to pick them up when I go shopping (I know, it defeats the object!) and I think one of the problems (apart from a complete lack of organisation on my part) is that they never fold into anything, so I end up stuffing them into another bag, and maybe remebering to fold one up and put it in my handbag before I go out the door. I bought a bag like this ages ago and loved the fact it folded up on itself, so I thought it would be easy to show you how to make one for yourself.
You will need:
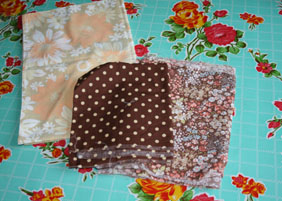
- A pillowcase – I used an old one I picked up for pence at a charity shop
- Co-ordinating / contrasting cotton fabric ( a fat quarter would be ideal as you don’t need loads) for the pocket.
- Strip of contrasting / co-ordinating fabric for the top of the bag – slightly more than twice the width of the bag and 12cm deep.
- Scrap of ribbon or a strip of matching fabric
- Matching / contrasting thread
- Pins
- Scissors
- Dressmakers’ chalk
- Sewing machine
- Iron and ironing board
Cut out for the pocket :
2 rectangles of co-ordinating fabric – I used 2 different ones for the front and back both for interest and for demonstration purposes. Your rectangles need to be 20 x 26 cm, (this includes a 1cm seam allowance).
You also need to cut a strip of ribbon (or use a piece of fabric you have hemmed) 14cm long to use as a hanging hook for your bag – useful for storing, or for maybe adding a key chain to?
Make the bag:
Take your pillowcase and measure from the sewn end 55cm – this makes a nice deep bag, although if you want a smaller bag, feel free to make it less. Mark with chalk a line across your bag. On my bag I measured to the point where the pillowcase folds over on the inside, and trimmed that off. You’ll need to keep the fabric you trim off as it makes the handles for the bag.
Handles: separate off the excess fabric you have from trimming your pillowcase. Mine was sewn all the way round, so I trimmed off the back piece from the “flap”(the bit that holds your pillow in place), and took apart the seams to release the flap of fabric. This left me with 2 bits of fabric. If your pillowcase only has one seam then just unpick it so you have 1 long strip of fabric. Making sure that the strip/s are even in size all the way along, fold it in half widthways, and iron a crease. Pull it apart and cut along the line you have just ironed in so you have 2 or 4 strips, like this:
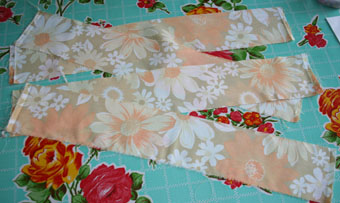 If you have 4 strips (like mine) you will need to join them – I sewed mine twice in the same place with a small stitch, as this seam takes a lot of strain when you are using the bag. If you have 1 long strip then you don’t have to bother sewing. You could use the sewing that is in fromwhen the pillowcase was made, but I would strengthen it with a row of stitching too – trust me on this one! Iron the seam you have just made apart to make it less bulky to sew.
To finish the handles, fold the strips in half widthwise with wrong sides together (i.e. with the right sides on the outside, and remember you are making a long strip, not folding it in half!), iron the crease in place. Fold your raw edges in to the middle about a centimetre, like this:
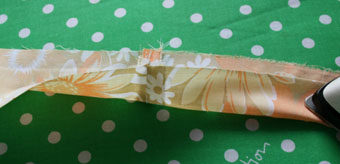
and like this:
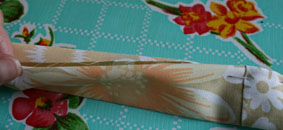
Pin along the edge you have just folded in. I would always pin where the line of stitching is – make sure when you are sewing that your stitches are near to the edge of the fabric, and that you sew to the point of the pin, and pull the pin towards you. Saves you getting in no end of bother! Sew where you have just pinned on both strips – if you want you can do a line of machine stitching on the other side to match feel free, but it’s not a problem if you don’t want to. Set straps aside.
Next – trim the top of your bag. Using the strip of fabric, measure twice the width of your pillowcase plus 2cm for seam allowance. Foe example, my pillowcase measured 48cm across, so my strip would be 98cm (48cm +48cm +2cm). Accurate measuring is key here! Fold the strip right sides together widthwise, pin and sew so that you are making a tube. Press apart seam allowance. With right sides of fabric facing you fold the tube in half widthwise and iron – this crease will enable the fabric to sit over the raw edge of the bag. Then tuck under the raw edges of the tube and iron them down. This should look like a tube of bias binding and sit over the bag quite neatly. Pin in place, lining up the seams, like this:
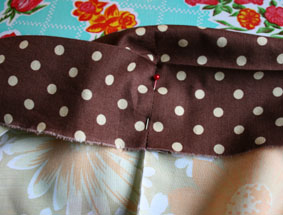
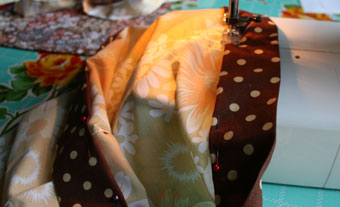
Sew into place with a small – ish stitch for strength.
Once you have attached the binding at the top of the bag you need to add your straps – I placed mine 11cm in from the side seams, but if your bag is wider or narrower then feel free to alter this so that it both looks and feels right to you. Pin in place to try. You can also alter the length of your straps at this point if you wish. The important thing is that the straps are placed evenly and in the same place on both sides, otherwise the bag won’t hang straight when being used.
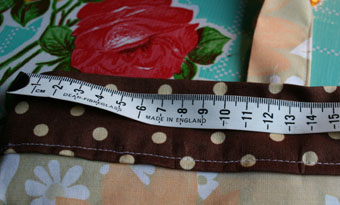
Fold under the raw edge of each strap (I tend to use the side with the stitching as the inside of the strap, but this isn’t important, again as long as it matches on both sides!) 2.5cm, and pin this down where you want them to be. I didn’t put mine all the way down to the sewn edge, but in the middle, like this:
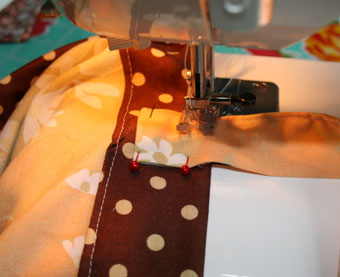
Sew into place making a box shape, and reinforcing the first line of stitching, like this:
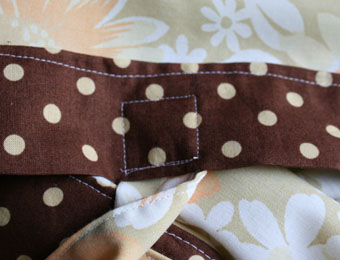
You have now made your bag – you could stop there and just fold your bag up – it’s ideal for decorating or adding embellishments to, but if you want to make a little pocket for it to fold into, read on….
Variation: you could make a flat bottom for your bag by pinching in the corners and sewing across them.
Take the 2 squares you cut from fabric, and place them right sides together. Find the middle of the long edge and place your folded ribbon in, so that the raw edges are in line with the fabric. In my picture I have stuck them out slightly so that you can see them.
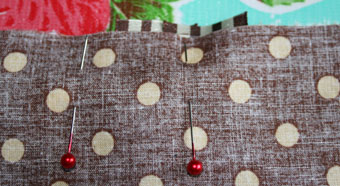
Pin around the edge, leaving a gap in one of the shorter edges. When pinning I find it easiest to pin horizontally so you can (with care) sew over your pins – if you do this place a different coloured pin in vertically to mark where you need to leave your gap. You wouldn’t believe how easy it is to get carried away and sew all the way round! Sew using a 1cm seam allowance. I have used a white thread for it to show up in pictures but I would usually use a matching thread throughout.
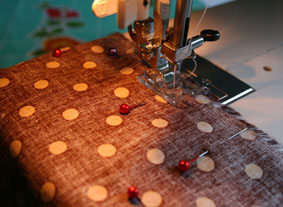
Remove the pins, and trim off the corners of the fabric close to the line of sewing
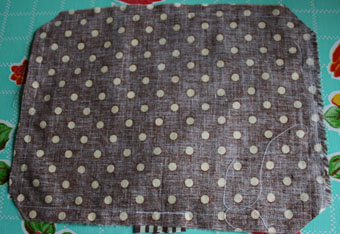
Using the gap in the side turn right side out, making sure the corners are poked out so that they are nice and square – sometimes using the blunt end of some scissors helps, but be careful to not make a hole in your lovely sewing! Give this a bit of an iron to flatten it out – if your fabric is a bit “springy” then you may fin putting some steel (not pearl headed cos they melt….) pins in whilst you iron may help, and sew along the short edges (this closes the gap on one edge.
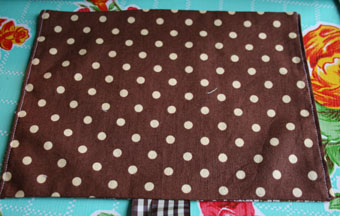
This is the careful part – the pocket is only attached to the bag on one side, so you need to fold over and sew down the other side. Fold one edge towards the middle, making sure that you tuck in your hanging loop.
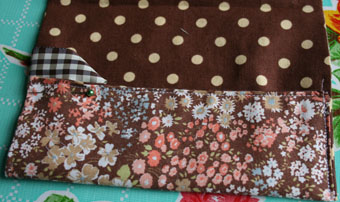
Sew from the middle to the folded edges to secure – I find that if you sew about 1cm, then reverse and sew back on yourself, then sew the line you wanted to makes areas where there will be high stress on the fabric much stronger and longer lasting. You have now made the part that isn’t attached to the bag.
Fold in the other side and pin. Now, find the vertical middle of your shopping bag, mark with a crease or a chalk line, and mark 12cm up from the bottom of the bag. Fold the pocket in half to find the middle and use this to pin in place on your bag. I find that it is easier to get the pocket placed, and pin through the front and back layers, then to move the pins to sew it. Just remember to move them!
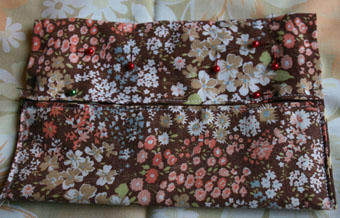
This picture is a bit confusing, however, cos I took it upside down. You are sewing in a “U” shape down the short side, across the bottom and up the other side again, but the sewn edge needs to be facing the bottom…. hope that makes sense.
Trim off all your bits of thread and give the whole thing a press. To fold the bag up, turn the bag over so the pocket is face down. Fold the edges of the bag in to the middle, fold the straps down, and fold in the bag until you reach the pocket, fold up the bottom edge, then fold the pocket over the bag, so it looks like this.
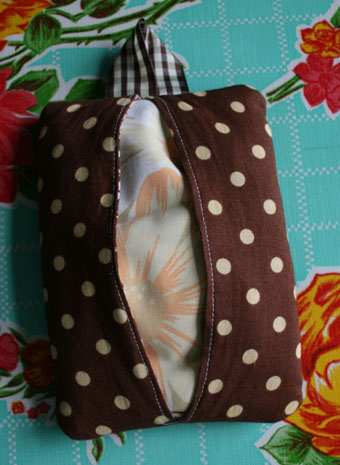
I will try and put together a PDF of the folding instructions for you so that you can print it and include in with the bag if you are giving it as a gift. If you find your bag wants to “escape” from the pocket you could always make a button loop and attach a small button for closing up.
Once you have made one they get quite addictive and it’s easy to make loads in an afternoon, production line style
I will be back again with instructions for the strawberry bag soon. Enjoy! xoxo
- pinky and boo , Tutorials
- Comments(1)
You make it all look so easy! xoxo